
Domestic Air Source Heat Pump Installation
What is an air source heat pump?
Most home heating systems either burn fuel or convert electricity into
heat. But heat pumps are different because they don't produce heat.
Instead, they transfer existing thermal energy from the outside into
your home. This makes them more efficient. Because they provide more thermal
energy than they consume electrical energy. As a result, heat pump systems are
less expensive to operate than conventional fossil fuel heating systems.
How does an air source heat pump work?
An air source heat pump works much like a refrigerator running in
reverse to heat your home. Here's how it works:
1. Outside air is blown through a network of pipes filled with
refrigerant. This causes the refrigerant to heat up and change from liquid to
gas.
2. This gas is passed through the compressor, which increases the
pressure. Compression also adds more heat - similar to how an air hose heats up
when you inflate a tire.
3. The compressed hot gas enters the heat exchanger surrounded by cold
air or water. The refrigerant transfers its heat to this cold air or water,
making it warmer. This circulates in your home to provide heating and hot
water. At the same time, the refrigerant condenses back to the cold liquid and
starts the cycle again!
The process of installing an air source heat pump
As with any home change or addition, there are several steps to an air
source heat pump installation.
Test
Any installation will begin with a proper inspection of your property.
This will ensure that the recommended ASHP is the one that best suits your
needs. A mutually convenient appointment will be scheduled for the engineer to
visit and conduct a full assessment. This will enable the engineer to generate
a written recommendation report and even show you the savings you might be able
to make.
The engineer will also assess your heating needs, how big the house is,
the level of installation in the house, how you want to distribute the heat
(floor heating, radiators, etc.) and more. Detailed sketches of rooms in your
property can be used to help installers do their job as efficiently as
possible.
Install
1. Install the indoor unit
2. Create an access point at home
3. Connect the outer pipe to the indoor unit
4. Install the outdoor unit
5. Connect wires and electricity
6. The finishing touches
Ductless heat pump systems are easier and faster to install than ducted
systems. The actual installation process of each indoor unit takes an average
of one day. Systems with multiple units or systems using ductwork will have a
longer installation process. Most installations will follow the six steps
described below.
Step 1: Install the indoor unit
Most will start by setting up the indoor unit for your air source heat
pump.
If you choose to install a ductless system, the contractor will find an
unobstructed spot on the wall within the area to place the installer unit. The
installer will install a mounting plate to support the indoor unit and then
attach the indoor unit to it.
If you choose ductwork, your installer will also need access to your
ductwork so they can connect the indoor unit to the ductwork (whether in the
attic, basement, or elsewhere). If you have an existing plumbing system that
the contractor will use, they will likely also take the time to make any
necessary repairs to maximize the efficiency of the new heat pump system. If
you don't have existing ductwork in your home, installing ductwork to circulate
the air will be the first step they take.
Step 2: Create an access point on the wall to connect
An access point is required between the indoor unit or air handler and
the outdoor condenser. To do this, your installer will drill holes in the wall
to run pipes and lines.
This will provide an outlet for the refrigerant lines, electrical
wiring, and condensate drain lines that carry water from the indoor unit to the
outdoors. The installer will use the hole saw on the outside of your home and
in the room where the indoor unit is installed for small split systems. In
ductwork, the access point is where the indoor air handler will be located in
your home (usually in the attic or basement).
Step 3: Connect the pipes to the indoor unit
Next, connect the refrigerant line and the condensate line to the indoor
unit. The refrigerant lines allow refrigerant to circulate through the indoor
and outdoor condensers. Depending on whether your air source heat pump is
heating or cooling at the time, the pipes will deliver warm or cool liquid to
the indoor unit, which will then be forced into the area as air.
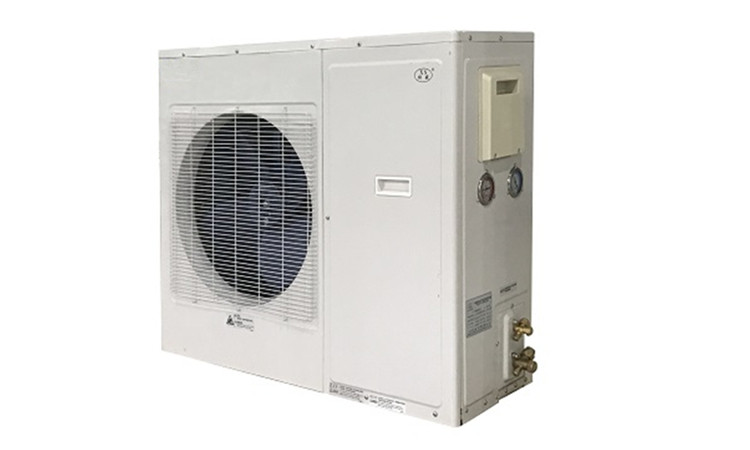
Step 4: Install the outdoor unit
Once the indoor unit is ready, your contractor will install the outdoor
unit. For larger systems (package or central), the installer will usually place
a concrete slab on the ground to secure the outdoor condenser. If this is a
small split system or an air source heat pump with a smaller system, it will
usually be installed on one side of your home. This is often raised above ground
level, especially in cold areas where installers ideally place the system above
the likely snow line.
Step 5: Connect Wires and Power
After installing the indoor and outdoor units, the installer will
connect them with refrigerant lines and wires. The installer will either
insulate these lines and run the lines through conduit on the side of your home
to protect the lines from the elements. Drains will also be installed on the
outside of the house to carry condensate from the unit away from the inside of your
home.
Step 6: Finishing work
Completing the system installation requires some finishing touches. One
is to fasten the pipes to the side of the house to keep them safe. Another is
installing sensors, many air source heat pumps will feature sensor technology
that communicates the temperature of different zones to your thermostat. Many
air source heat pumps also come with wireless remote controls to adjust the
temperature and allow monitoring and changes via an internet connection on a
computer, tablet or mobile phone.
Maintain
Air source heat pumps can last up to 20+ years; if properly maintained,
little maintenance is required during this time. The maintenance you can
perform to ensure your equipment is operating as expected are:
1. Clean and/or replace the filter
2. Clean the coil and fan (if necessary)
3. Ensure proper airflow is not obstructed by debris (leaves, dust,
etc.)
4. Cleaning the supply and return register on the property
5. Power off the unit and check/clean the fan blades.
Before winter (or summer, if used for cooling), it is advisable to have
the unit serviced by a professional who will perform a more advanced review of
the components and identify issues that may be reducing heat pump performance
without the user being aware or able to diagnose it. These checks will include
the following:
1. Check the pipes for leaks and repair if necessary
2. Inspect filters, pipes, blowers and indoor coils for dirt and other
obstructions
3. Measure the airflow is correct
4. Check the refrigerant level and pressure
5. Check all electrical contacts and make sure they are protected
6. Check for system leaks
7. Check reverse heat/cool controls and verify they are operating as
required
8. Lubricate moving belts, motors and inspect for damage/wear
9. Inspect and test the thermostat under normal operating conditions.
In most cases, unlike other renewable energy technologies such as solar
photovoltaics and wind turbines that use expensive inverters, heat pumps
typically do not require replacement of expensive components during their
lifetime.
Air source heat pump installation drawing
The installation diagram of the air source heat pump is shown in the
following figure
Can I install an air source heat pump myself?
After purchasing a heat pump, you can set up the equipment yourself.
This part is not technical and does not require a license, it will save money
during installation if the unit is already in its place when a certified
technician comes to install it. The heat pump consists of two main units,
outdoor and indoor. To illustrate how to save installation costs, the outdoor
unit can be installed outdoors, and the indoor unit can be installed on a wall
bracket or wall bracket for installation.
However, this is the only thing you can do as an individual if you are
not trained on the subject. It is a trained gas installer who must install the
heat pump and connect the parts. If you need to install an air-to-water heat
pump, a certified technician is also required to connect the heat pump outdoor
unit to the indoor unit.
Tasks that do not require a technician and can be done by you include
assembling major heat pump components. After the heat pump is installed, an
authorized installer will connect the components. Furthermore, even the
electricity has to be connected, as there are some rules and regulations to
follow in this regard. Therefore, you must have a licensed electrician to do
this.


